")
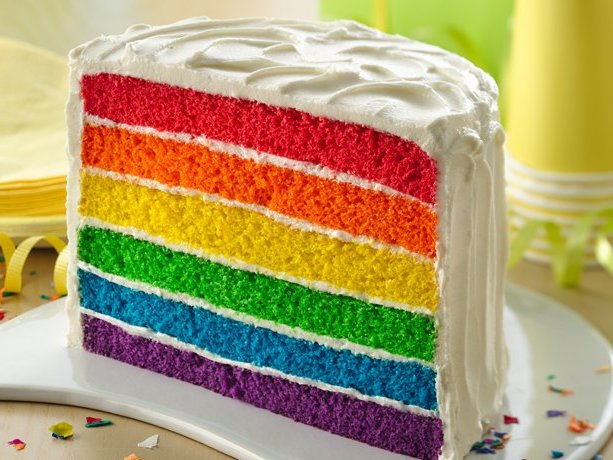
So there appears to have formed a tradition whereby every year for my daughter’s birthday I now try to fashion some kind of recognisable animal from sponge cake, with not much of a clue how I am going to do it until the night before. Last year I made a penguin, the year before that a monkey. This year, turning three years of age, E is a lot more vocal and persistent about what she wants. For at least three weeks before her party all I heard was ‘want a RAINBOW CAKE Mummy…’ which was enough to send me right to the gin bottle. I mean – I have all my time to fuck about making seven individual rainbow-hued mini sponges, all of identical height and containing psychosis-inducing levels of food colouring, then somehow glue them together and make a perfect rainbow. Just look at this one. So I overrode the request – after all, I am technically still the boss of her. So I decided to make a dinosaur cake instead. Which almost drove me over the edge anyway.
This is how I almost achieved a nervous breakdown – now you can do this too! I decided this cake would be ENORMOUS as I don’t believe in undercatering, and I wanted it to be RAMMED full of filling. I can’t abide an unfilled sponge, it’s like an aberration of nature.
I made four sponges – twice the number of cakes you see below. Twenty eggs went in! I used this recipe for a ‘moist vanilla sponge cake’ and made two batches of it, and instead of using the full plain flour part of the recipe, I substituted 50g of cocoa powder per recipe batch (100g in total). Which gives a nice choco sponge, you see. I also didn’t bother making the vanilla drizzle that the recipe talks about – no need because this beast was going to be ICED, baby.
You’ll notice the cakes are different sizes – that’s just because I didn’t have two identical large tins, so opted for one large and one medium. As long as you have the same amount again, it’s not going to matter. I used the smaller sponges to make the head and tail parts, the large sponges for the body:

When the cakes are cool, cover a chopping board in some tinfoil (I am not classy enough to go out and buy a proper cake board). Then put strips of greaseproof paper all over it so that in theory when you come to ice the beast, you won’t make too much mess all over the foil, cause it will drip onto the paper bits which you can easily lift away:

Make your frosting. You will need frosting for the middle of each sponge, as well as TWO layers of it to ice the outside of this beast. I royally fucked up and forgot that I’d need to do two separate layers of outside frosting, which caused a lot of cursing, hair pulling and then dispatching my weary husband to Costcutter to get more butter, sugar, everything. He really appreciated this at 11:00 at night, when he still had to do about 1000 other birthday party prep tasks.
I always use a fantastic buttercream frosting recipe from Smitten Kitchen, but instead opt for salty butter instead of her unsalted, then add 300g of cream cheese to it to make it a little tarter:
Makes approximately 7.5 cups frosting:
810g icing sugar
510g lightly salted butter, at room temperature
9 tablespoons full fat milk
1 1/2 tablespoons vanilla extract
300g cream cheese
Whiz everything together in a food processor until smooth. For the cake filling, take out 3 cups of the frosting and mix in 400g melted cooled dark chocolate.
Add some green food colouring to the rest of the frosting and whiz it up in the food processor again, before refrigerating the mix until you need it – I used nearly a full bottle of Waitrose Essentials green liquid food colouring. It amused me greatly that the colour was not made of lethal E numbers, but instead of ‘spirulina algae’. How VERY posh!
If your big sponges are a bit curved on top (mine were) and won’t lie flat on top of each other, shave a bit off the top of each one with a sharp serrated knife (eg a breadknife) so that they’re less domed on top. Then cut each of the sponges in half with the same sharp knife and sandwich with lashings of frosting. Don’t forget to save frosting for the head and tail, too! (I forgot, um, while eating large amount of frosting off the spatula, then having to make more in a blind panic. There was no more melted chocolate to flavour it either, so I used cocoa. It was fine).

Use this diagram to roughly chop out 2 identical head/neck sections and 2 identical tail sections – use your sharp, serrated knife. If you have a steak knife, it might be more agile as will be smaller. Just do this by eye – don’t muck about with print-outs, no need for them as they are easy enough shapes. Once you have cut the first, place it on top of the other sponge as a cakey stencil and cut around it. It’s fiddly, you may swear a lot like I did:

Sandwich the head parts and the tail parts together their matching counterparts with more choco frosting.
I suddenly realised that I didn’t have any cake skewers left over from previous animal cakes to hold the limb and head pieces onto the cake. More swearing. Then I had a brainwave and used some long matches that I’d bought the day before. Tips removed and limbs attached as below!


Finally I had to frost this great big creature. Below you can see the first, gloopy layer of green frosting going on. No good at all – you can see the sponge coming through it and it looks well messy, so a second layer HAS TO BE MADE! The spirulina green food colouring makes for a rather tame shade of green, but I was past caring by this point. I had icing sugar in my hair and a chocolate moustache.


I chilled the dinosaur in the fridge for about 30 minutes to set the icing before adding another final layer to hide the patchiness of the first. I must add that this cake is so big that I discovered I had to remove all the interior door compartments of the fridge first in order to shoehorn the cake inside and shut the door. I was so stressed by this point that I was almost having an out-of-body experience. Husband was keeping a safe distance.
Second layer of frosting on – and now to the decorations! Smarties for the body spots (again, a total absence of evil E numbers, just sensible things like beetroot, sunflowers and dew colouring these fellas!), chocolate button for the eye, and chunks of Toblerone for the spines and hooves.
Er, do dinosaurs technically have hooves? Well, this one did. I think we christened the dinosaur ‘Andy’ in the end. Other weary parents of toddlers might get what I mean.

And so there you have it. By the end (it was about 1am when I finished) I was covered head to toe in icing sugar, grease and cocoa, but was so glad it was over. I shoehorned the dinosaur back into the fridge (it weighed about a metric tonne and was the size of a labrador) and collapsed into bed. I nearly cried at the stress of it all, but felt strangely serene when it was OVER. Phew. Plus people said it tasted nice, which is the main thing.
Madam inspecting her cake:


Congrats on a fab cake! I love it. 20 eggs!? And such funny writing – “I was so stressed I was having an out of body experience”. Haha, god – I know – birthday cakes get me quite flustered, even simple round ones. Happy birthday to the small one x x
LikeLiked by 1 person
Yup, 20 eggs and blood pressure soaring to dangerous levels ha ha ha! It’s amazing how just making a CAKE feels like open heart surgery or something much more important…naturally I took it in my usual stride :o) x x
LikeLike